【PR】この記事には広告が含まれています。
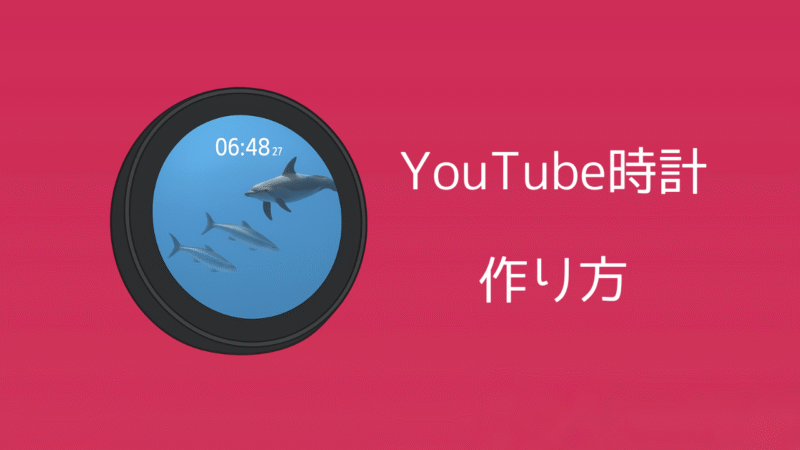
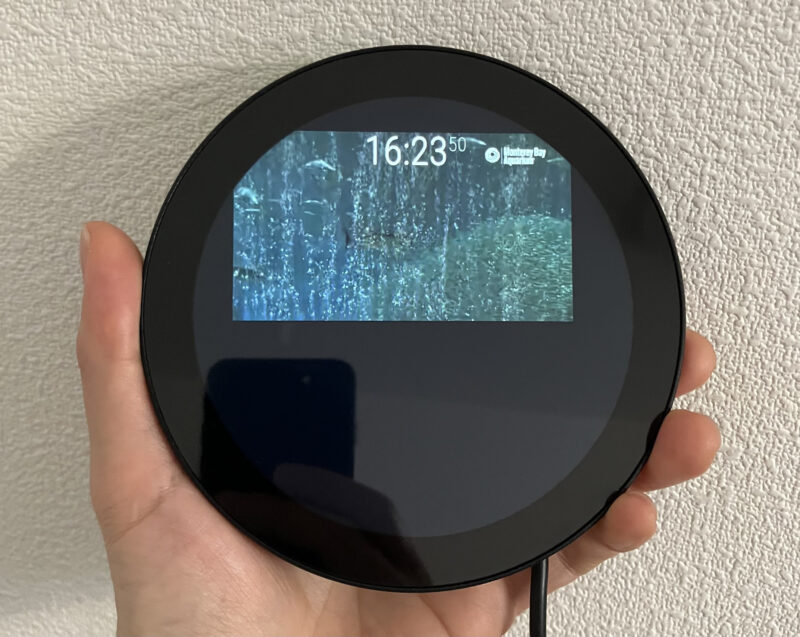
Raspberry Piを使った「YouTube動画を再生できる時計」の作り方をご紹介します。MagicMirror2というソフトを使用すれば、高度なコーディングの知識がなくても、比較的簡単に自作可能です。
YouTube動画はお好みの動画を再生できますが、おすすめは次のライブカメラです。
YouTube動画を全画面で表示し、その上に時刻を表示する仕組みは、通常のPCでも作成できます。しかし、専用の装置を作る場合には、コンパクトな「Raspberry Pi」がとても便利です。Raspberry Piの魅力は消費電力が少なく長時間の使用でも電気代を抑えられる点と、場所を取らないためディスプレイの裏側などにも簡単に収納できる点にあります。
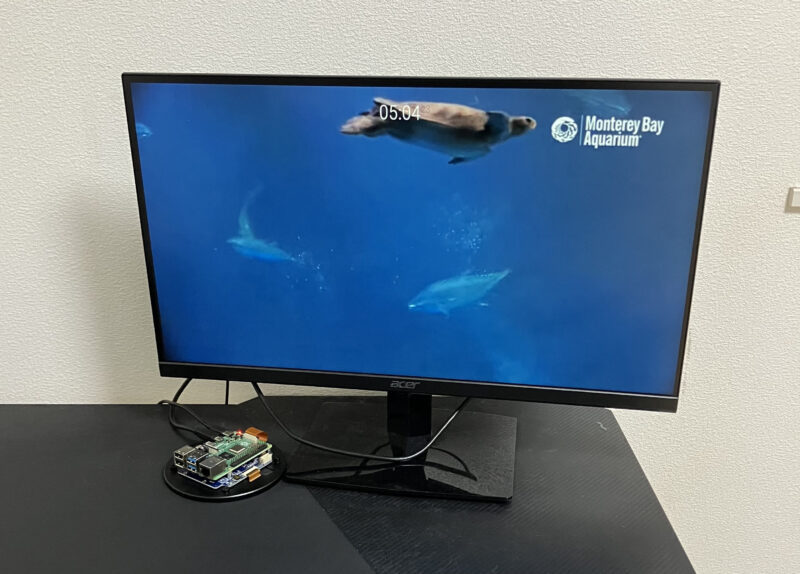
円形ディスプレイでなくても、一般的なHDMI対応ディスプレイで同様に表示を作成できます。
準備
円形ディスプレイに対応しているRaspberry Piのモデルを以下に示します。
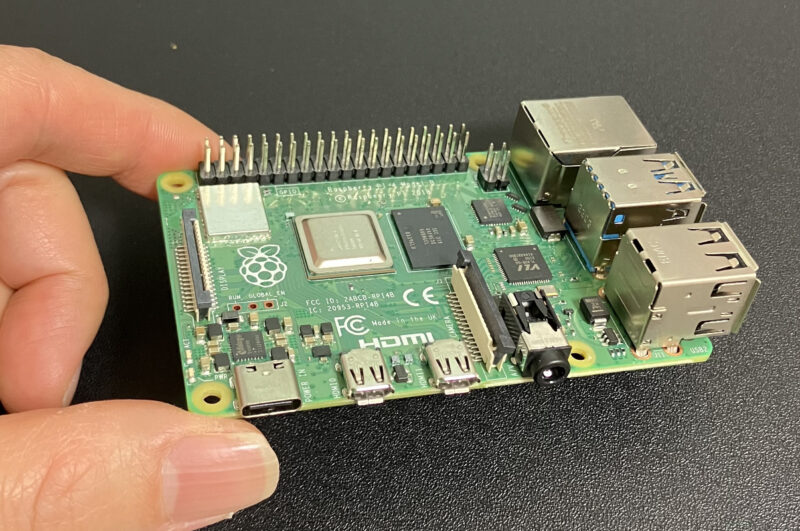
- Raspberry Pi 4 Model B
- Raspberry Pi 3 Model B+
- Raspberry Pi 3 Model A+
僕はRaspberry Pi 4を使用しました。メモリは1GBです。YouTube動画をスムーズに再生するためには、Raspberry Pi 4をおすすめします。
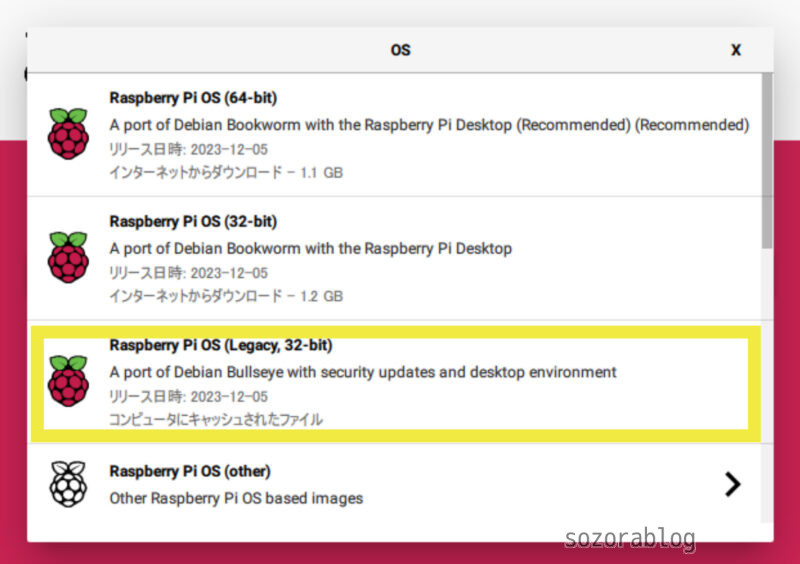
microSDにOSをインストールします。Raspberry Pi OS(Legacy,32-bit)を選択しました。最新版のBookwormだと円形ディスプレイのセットアップがうまくいきませんでした。
OSをインストールする方法は以下の記事で詳しく解説しています。
≫【2024年最新版】OSインストールから初期設定まで|セットアップ手順のすべて
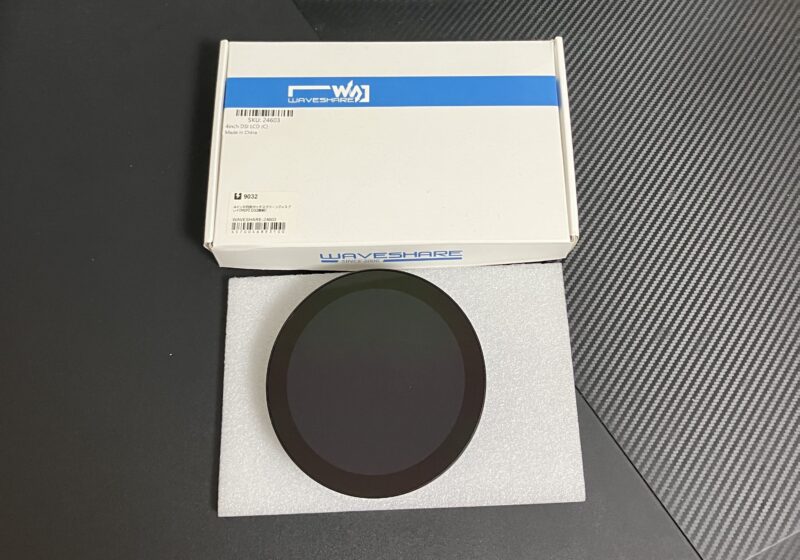
Waveshare製の4インチ円形タッチスクリーンディスプレイはスイッチサイエンスで購入可能です。3.4インチと5インチのタイプもあります。
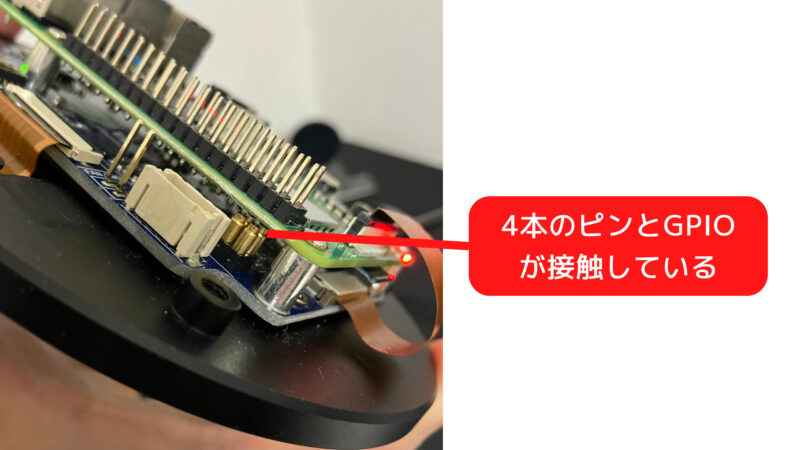
ラズパイをディスプレイのボードに取り付けると、4つのピンがラズパイのGPIOピンの裏側に接触します。これにより、ラズパイからディスプレイへ直接電力が供給されます。その結果、ラズパイに電源をつなぐだけで、ディスプレイも同時に給電される仕組みになっています。
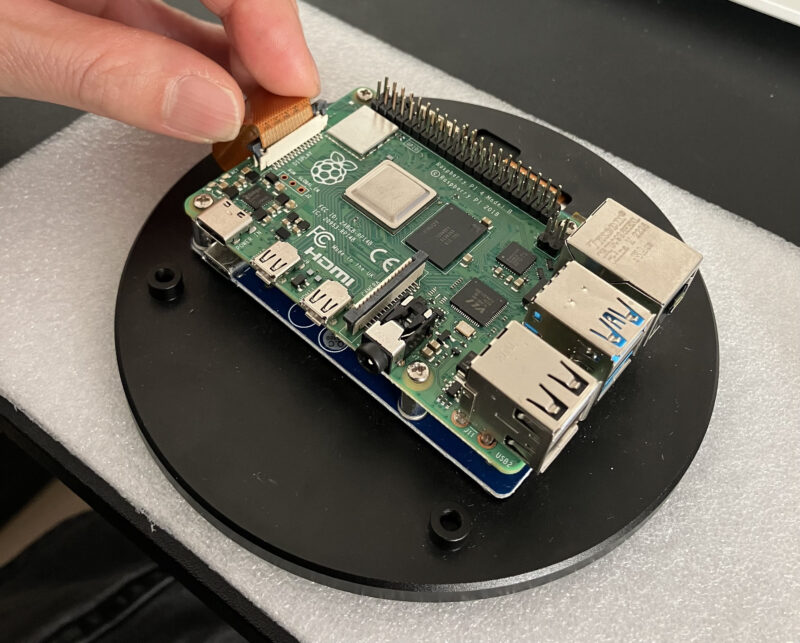
円形ディスプレイの裏側にRaspberry Piを取り付けます。
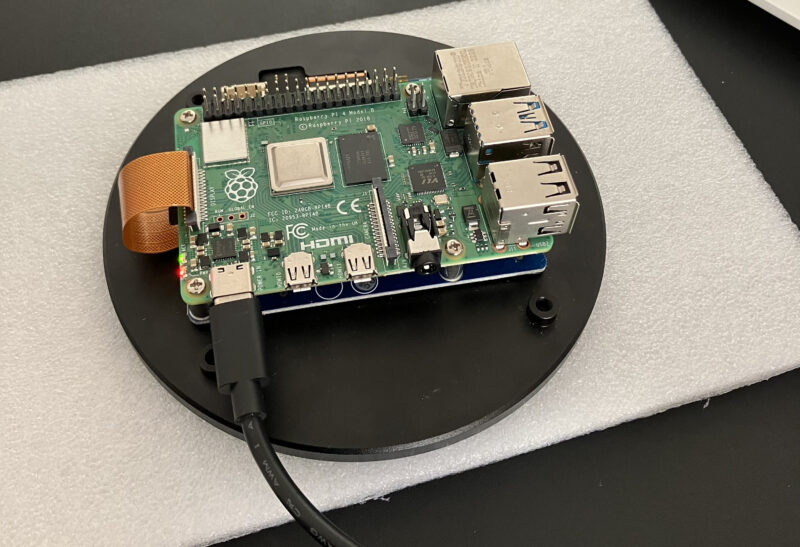
ディスプレイのコネクターを接続したら、電源ケーブルはRaspberry Pi側のコネクターに差し込みます。これにより、Raspberry Piが起動し、ディスプレイ側にも電源が供給されます。
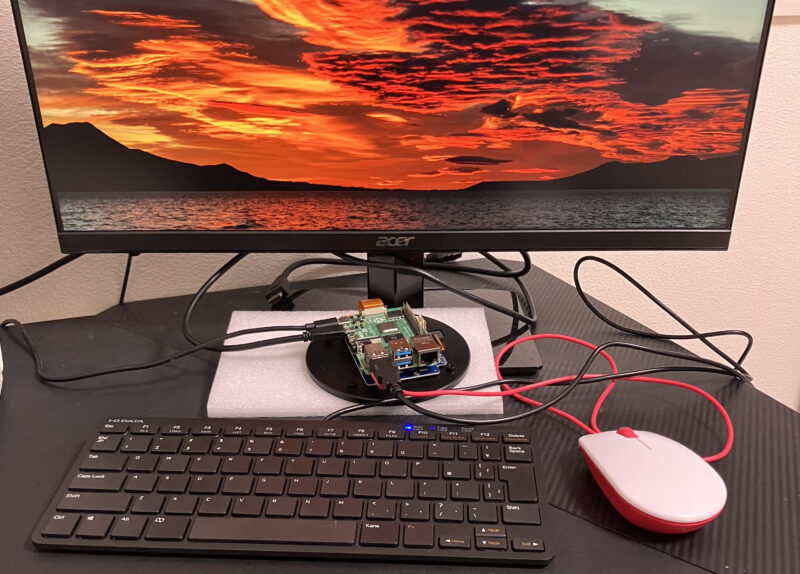
マウスやキーボード、ディスプレイを接続してRaspberry Piの初期設定をします。
初回起動時は円形ディスプレイ以外のHDMI対応ディスプレイが必要です。
初期設定が完了したら、メーカーのマニュアルに沿って円形ディスプレイのセットアップをします。
以下のコマンドを1行ずつ実行していきます。
git clone https://github.com/waveshare/Waveshare-DSI-LCD
cd Waveshare-DSI-LCD
cd 6.1.21
cd 64
sudo bash ./WS_xinchDSI_MAIN.sh 40C I2C0
sudo reboot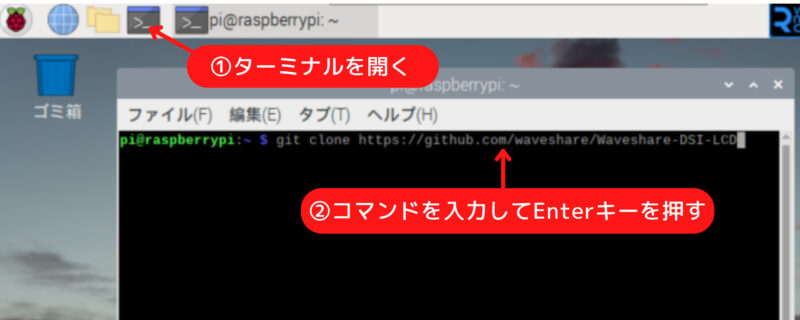
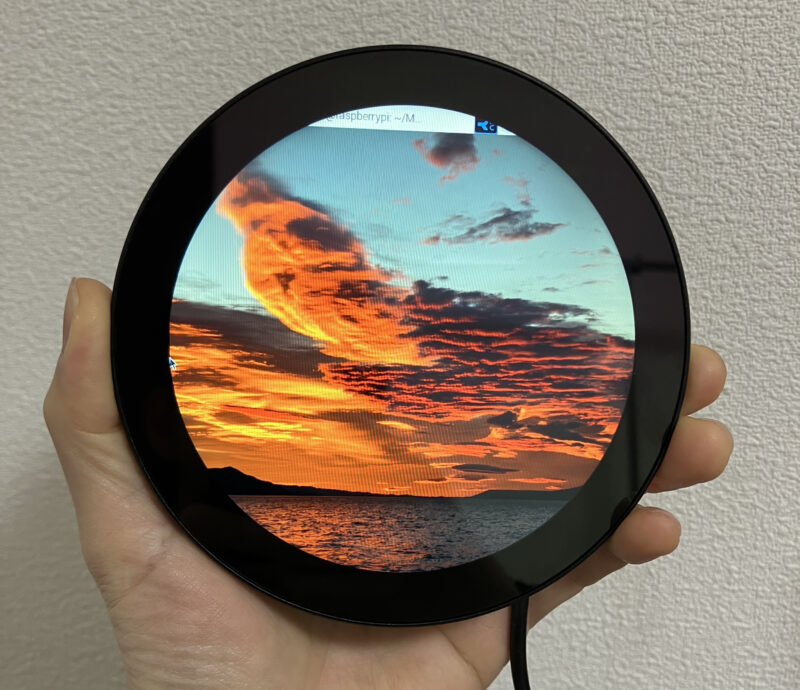
再起動後、円形ディスプレイにRaspberry Piのデスクトップ画面が表示されます。
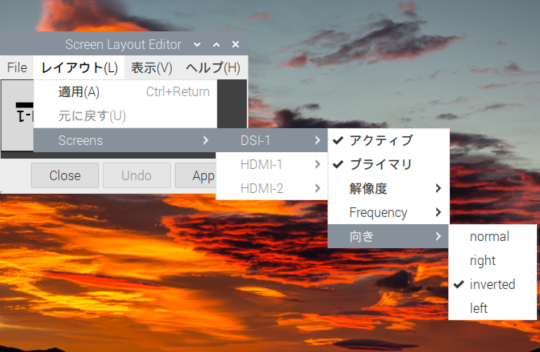
ディスプレイの表示方向は変更可能です。4種類の角度から選択できます。
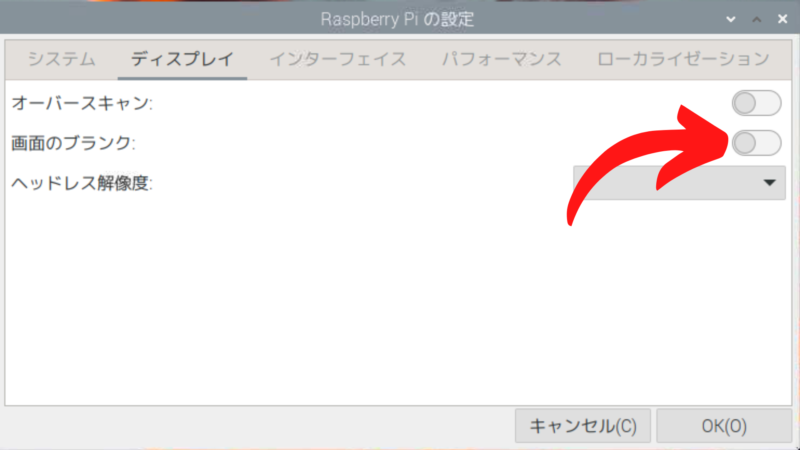
画面の自動暗転機能を無効化する
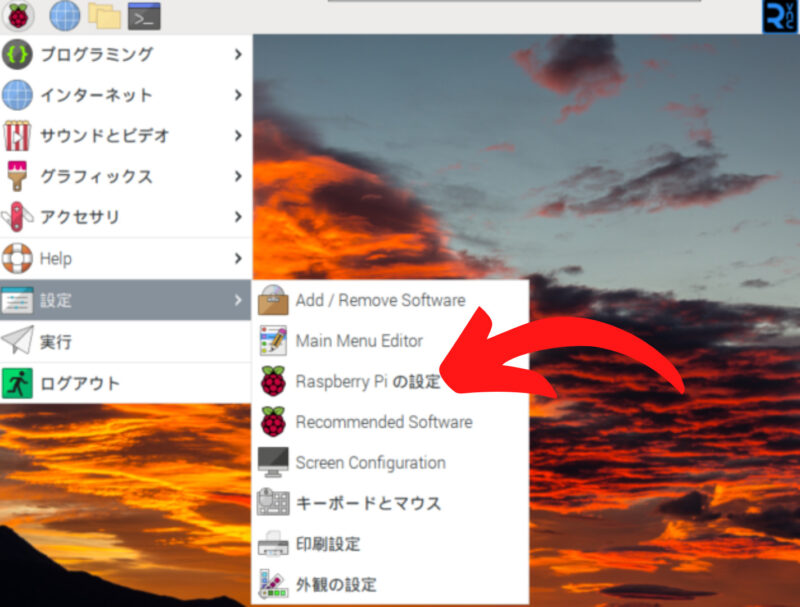
「Raspberry Piの設定」を開いて「画面のブランク」という項目をオフにします。これは、一定時間何も操作しないと画面が暗くなる機能です。この機能が有効になっていると、時計を長時間表示し続けることができません。
MagicMirror2をインストールする
MagicMirror2は情報表示が可能なスマートミラーを作成するためのオープンソースソフトウェアです。MagicMirror2を使えば、ミラーがなくてもクールな見た目のディスプレイ表示を作れます。
MagicMirror²の使い方で参考にさせていただいたサイト
マジックミラーが無くても情報表示にMagicMirror²を使う
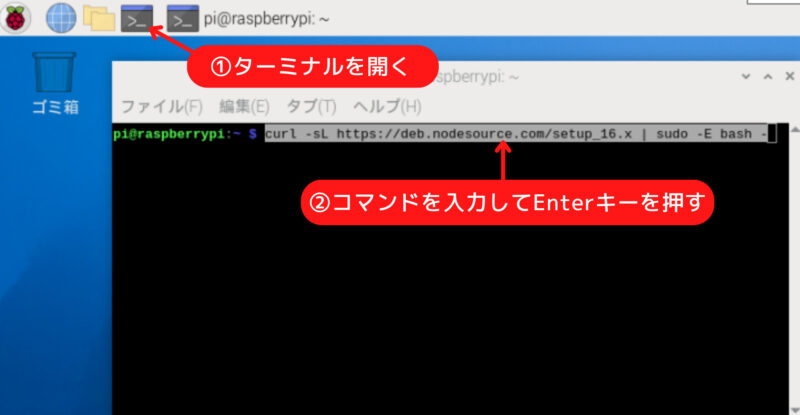
まず、ターミナルを開いて以下のコマンドを実行します。Node.jsの特定バージョンをインストールするための準備作業です。Node.jsはMagicMirror2で情報を表示するためのプログラムを作成する際に必要となります。
curl -fsSL https://deb.nodesource.com/setup_22.x | sudo -E bash -次に、以下のコマンドでNode.jsのインストールを行います。
sudo apt install -y nodejs以下のコマンドでGitHub上にあるMagicMirrorのリポジトリを複製します。
git clone https://github.com/MichMich/MagicMirrorMagicMirrorのディレクトリに移動します。
cd MagicMirror/MagicMirrorに必要な追加セットアップや構成を行います。
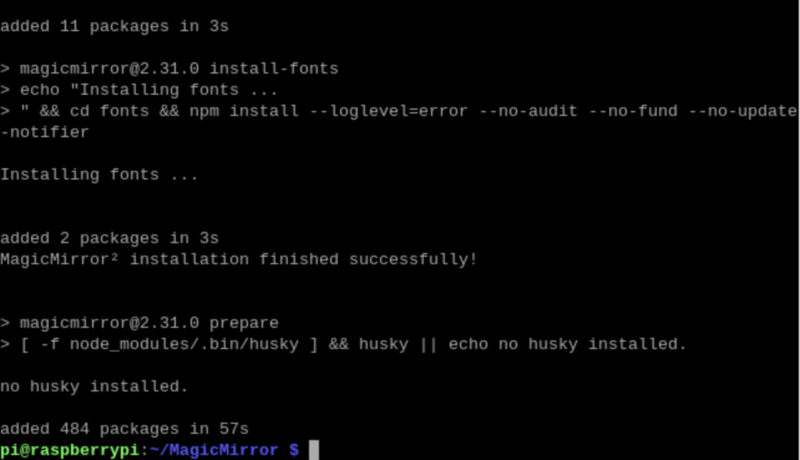
npm run install-mmMagicMirrorのインストールが正常に完了すると、以下のような表示が出ます。
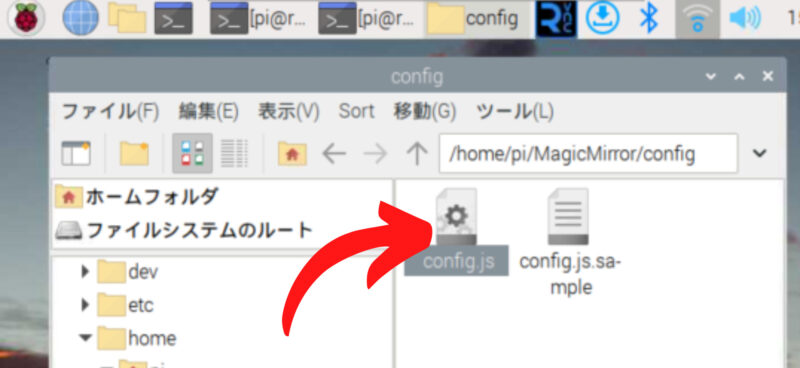
config.js.sample というサンプル設定ファイルを config.js という名前でコピーします。config.jsはMagicMirrorの画面設定を行うためのファイルです。
cp config/config.js.sample config/config.js以下を実行すると、MagicMirrorが起動して、config.jsにより設定された画面が表示されます。
npm run startMagicMirrorの画面が表示されました。
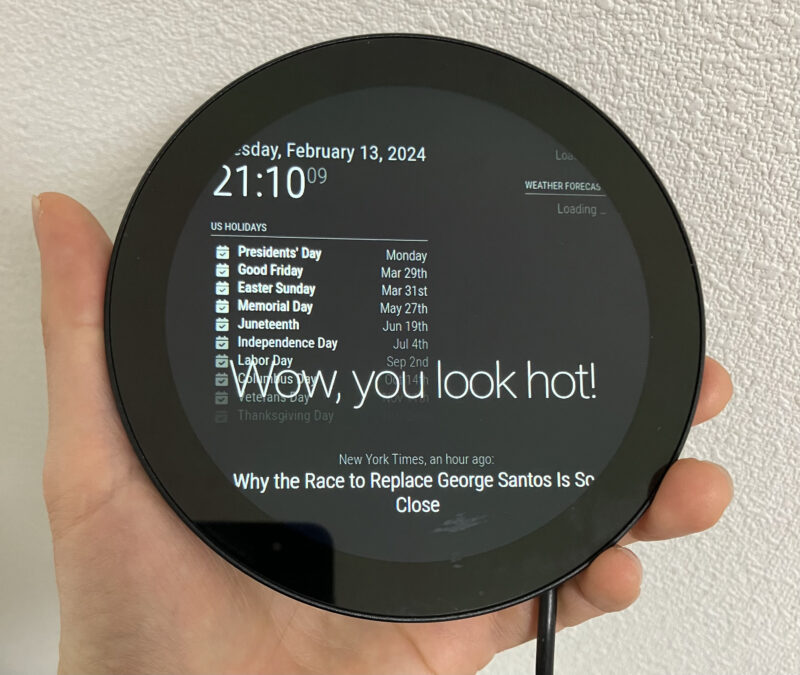
表示を中断するには、CtrlキーとQキーを同時に押してください。
ホームディレクトリからMagicMirrorを起動するときは、以下のコマンドを実行します。
cd MagicMirror/ && npm run startここで表示される内容は/home/pi/MagicMirror/config/config.jsのファイルにより設定されています。
config.jsの中身を見ていきましょう。
let config = {
	address: "localhost",	// Address to listen on, can be:
							// - "localhost", "127.0.0.1", "::1" to listen on loopback interface
							// - another specific IPv4/6 to listen on a specific interface
							// - "0.0.0.0", "::" to listen on any interface
							// Default, when address config is left out or empty, is "localhost"
	port: 8080,
	basePath: "/",	// The URL path where MagicMirror² is hosted. If you are using a Reverse proxy
									// you must set the sub path here. basePath must end with a /
	ipWhitelist: ["127.0.0.1", "::ffff:127.0.0.1", "::1"],	// Set [] to allow all IP addresses
									// or add a specific IPv4 of 192.168.1.5 :
									// ["127.0.0.1", "::ffff:127.0.0.1", "::1", "::ffff:192.168.1.5"],
									// or IPv4 range of 192.168.3.0 --> 192.168.3.15 use CIDR format :
									// ["127.0.0.1", "::ffff:127.0.0.1", "::1", "::ffff:192.168.3.0/28"],

	useHttps: false,			// Support HTTPS or not, default "false" will use HTTP
	httpsPrivateKey: "",	// HTTPS private key path, only require when useHttps is true
	httpsCertificate: "",	// HTTPS Certificate path, only require when useHttps is true

	language: "en",
	locale: "en-US",
	logLevel: ["INFO", "LOG", "WARN", "ERROR"], // Add "DEBUG" for even more logging
	timeFormat: 24,
	units: "metric",

	modules: [
		{
			module: "alert",
		},
		{
			module: "updatenotification",
			position: "top_bar"
		},
		{
			module: "clock",
			position: "top_left"
		},
		{
			module: "calendar",
			header: "US Holidays",
			position: "top_left",
			config: {
				calendars: [
					{
						fetchInterval: 7 * 24 * 60 * 60 * 1000,
						symbol: "calendar-check",
						url: "https://ics.calendarlabs.com/76/mm3137/US_Holidays.ics"
					}
				]
			}
		},
		{
			module: "compliments",
			position: "lower_third"
		},
		{
			module: "weather",
			position: "top_right",
			config: {
				weatherProvider: "openweathermap",
				type: "current",
				location: "New York",
				locationID: "5128581", //ID from http://bulk.openweathermap.org/sample/city.list.json.gz; unzip the gz file and find your city
				apiKey: "YOUR_OPENWEATHER_API_KEY"
			}
		},
		{
			module: "weather",
			position: "top_right",
			header: "Weather Forecast",
			config: {
				weatherProvider: "openweathermap",
				type: "forecast",
				location: "New York",
				locationID: "5128581", //ID from http://bulk.openweathermap.org/sample/city.list.json.gz; unzip the gz file and find your city
				apiKey: "YOUR_OPENWEATHER_API_KEY"
			}
		},
		{
			module: "newsfeed",
			position: "bottom_bar",
			config: {
				feeds: [
					{
						title: "New York Times",
						url: "https://rss.nytimes.com/services/xml/rss/nyt/HomePage.xml"
					}
				],
				showSourceTitle: true,
				showPublishDate: true,
				broadcastNewsFeeds: true,
				broadcastNewsUpdates: true
			}
		},
	]
};

/*************** DO NOT EDIT THE LINE BELOW ***************/
if (typeof module !== "undefined") { module.exports = config; }
MagicMirror²では、「モジュール」を使用して画面に特定の情報や機能を表示します。ここでのモジュールは、例えば時計や天気予報のような要素の一つ一つのことを指します。
上記の設定で使用しているモジュールは以下の通りです。
- alert:重要なお知らせや警告を画面に表示
- updatenotification:MagicMirrorの新しい更新情報を表示
- clock:現在時刻を表示
- calendar:アメリカの休日を含むカレンダーを表示
- compliments:その時々に合わせた優しい言葉を表示
- weather:ニューヨークの今の天気とこれからの天気予報を表示(APIキーが必要)
- newsfeed:ニューヨークタイムズの最新ニュースの見出しを表示
MagicMirror²にはこれらのモジュールが豊富に用意されており、それらを組み合わせることで自分好みの表示にカスタマイズできます。
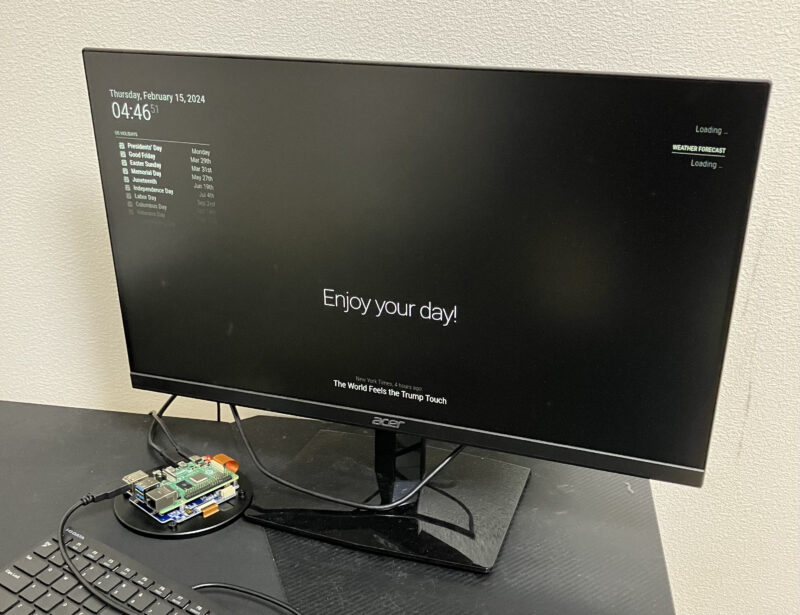
円形ディスプレイではなく、HDMI対応ディスプレイに表示した場合は、このような画面になります。
YouTube動画を表示するための設定
ここからはMagicMirror²をカスタマイズしていきます。
MMM-EmbedYoutubeをインストールする
MagicMirrorの画面にYouTube動画を表示するには「MMM-EmbedYoutube」というモジュールをインストールする必要があります。
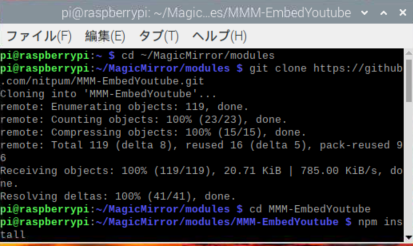
以下のコマンドを1行ずつ順に実行します。
cd
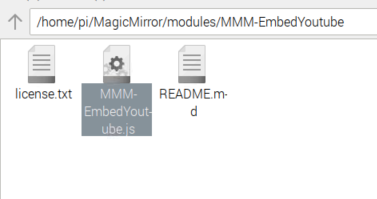
cd ~/MagicMirror/modules
git clone https://github.com/nitpum/MMM-EmbedYoutube.git
cd MMM-EmbedYoutube
npm installMMM-EmbedYoutube モジュールが MagicMirror に追加され、使用する準備が整いました。
config.jsを編集する
インストールが完了したら、MMM-EmbedYoutubeを表示するための設定に進みます。
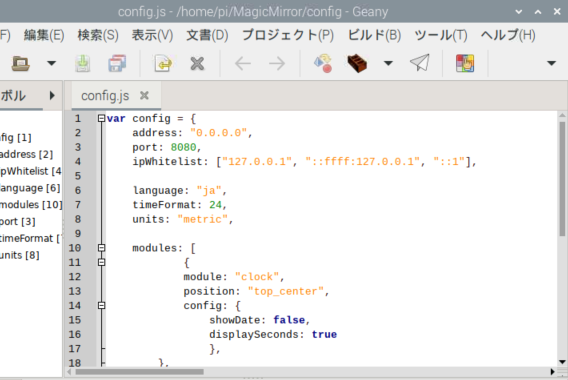
/home/pi/MagicMirror/config/config.jsをダブルクリックして開きます。
今回はアメリカのモントレーベイ水族館のライブカメラを表示します。
config.jsを以下の内容に書き換えて保存します。
var config = {
    address: "0.0.0.0",
    port: 8080,
    ipWhitelist: ["127.0.0.1", "::ffff:127.0.0.1", "::1"],

    language: "ja",
    timeFormat: 24,
    units: "metric",

    modules: [
    		{
			module: "clock",
			position: "top_center",
            config: {
                showDate: false,
                displaySeconds: true,
                },
		},
{
    module: 'MMM-EmbedYoutube', // Path to youtube module from modules folder Exmaple: MagicMirror/modules/custom/MMM-EmbedYoutube/ so it's custom/MMM-EmbedYoutube
    position: 'top_left', // This can be any of the regions.
    config: {
      // See 'Configuration options' in README.md for more information.
      video_id: 'QXhVdEyLRT0',
      loop: true,
      autoplay: true,
    },
  },
    ]
};

/*************** DO NOT EDIT THE LINE BELOW ***************/
if (typeof module !== "undefined") { module.exports = config; }
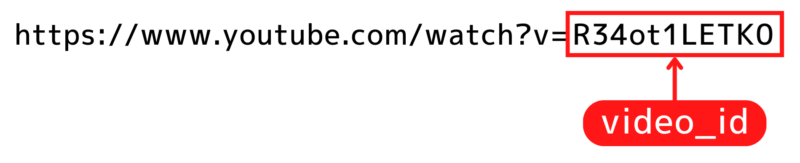
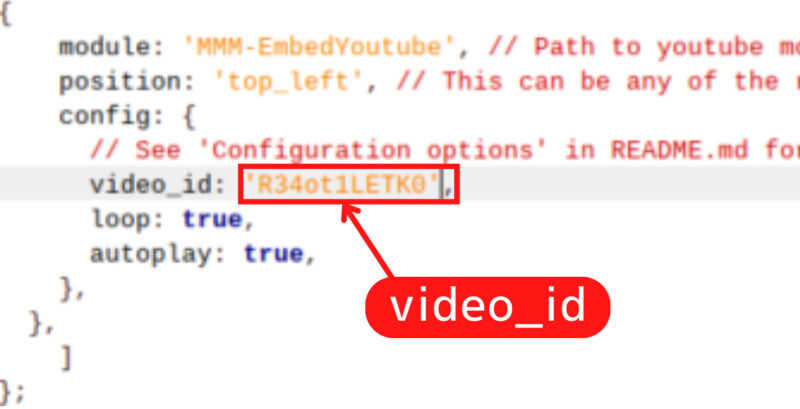
選択する動画のURLの末尾の部分(この場合は”R34ot1LETK0″)をvideo_id:に入力します。
cd MagicMirror/ && npm run start を実行して表示してみます。
動画の表示が確認できました。しかし動画のサイズが小さいので調整が必要です。
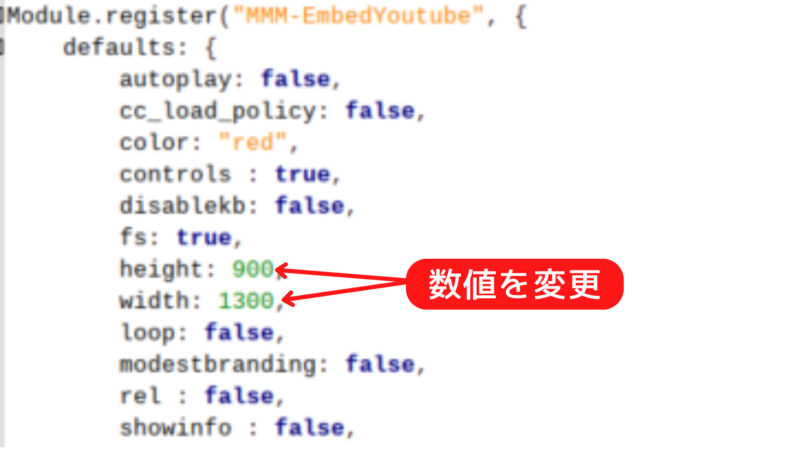
YouTube動画の表示サイズを変更
YouTube動画の表示サイズを変更します。/home/pi/MagicMirror/modules/MMM-EmbedYoutube/MMM-EmbedYoutube.jsの18行目と19行目の数値を変更します。ここでは画面の横幅を1300ピクセル、縦の長さを900ピクセルにしています。
/* Magic Mirror
 * Module: Embed Youtube
 *
 * v 1.4.0
 *
 * By Nitipoom Unrrom (aka nitpum) https://nitpum.com
 * MIT Licensed.
 */
Module.register("MMM-EmbedYoutube", {
	defaults: {
		autoplay: false,
		cc_load_policy: false,
		color: "red",
		controls : false,
		disablekb: false,
		fs: true,
		height: 900,
		width: 1300,
		loop: false,
		modestbranding: false,
		rel : false,
		showinfo : false,
		video_id : "",
		playlist: "",
		video_list: []
	},
	getDom: function () {
		var wrapper = document.createElement("div");

		// Parameter
		var params = "";

		var videoList = "";
		if (this.config.video_list && this.config.video_list.length > 0) {
			videoList = "&playlist=";
			for (var i = 0; i < this.config.video_list.length; i++) {
				videoList += this.config.video_list[i];
				if (i + 1 < this.config.video_list.length)
					videoList += ",";
			}
		}
		params += (this.config.autoplay) ? "autoplay=1" : "autoplay=0";
		params += (this.config.cc_load_policy) ? "&cc_load_policy=1" : "&cc_load_policy=0";
		params += (typeof this.config.color !== "undefined" && this.config.color != "red")? "&color=" + this.config.color:"";
		params += (this.config.controls)? "&controls=1":"&controls=0";
		params += (this.config.disablekb)? "&disablekb=1":"";
		params += (this.config.fs)? "":"&fs=0";
		params += (videoList != "" && (typeof this.config.playlist === "undefined" || this.config.playlist == "")) ? videoList : "&playlist=" + this.config.video_id; // required playlist to loopable
		params += (this.config.loop) ? "&loop=1" : "";
		params += (this.config.modestbranding) ? "&modestbranding=1" : "";
		params += (this.config.rel)? "&rel=1": "&rel=0";
		params += (this.config.showinfo)? "&showinfo=1": "&showinfo=0";

		var videoId = this.config.video_id +"?version=3";
		if (typeof this.config.playlist !== "undefined" && this.config.playlist != "")
			videoId = "playlist?list=" + this.config.playlist + "&";

		wrapper.innerHTML = "<iframe width=\"" + this.config.width +"\" height=\"" + this.config.height + "\" src=\"https://www.youtube.com/embed/" + videoId + "&"+ params +"\" frameborder=\"0\" allowfullscreen></iframe>";
		return wrapper;
	}
});
表示してみると、以下のようになりました。
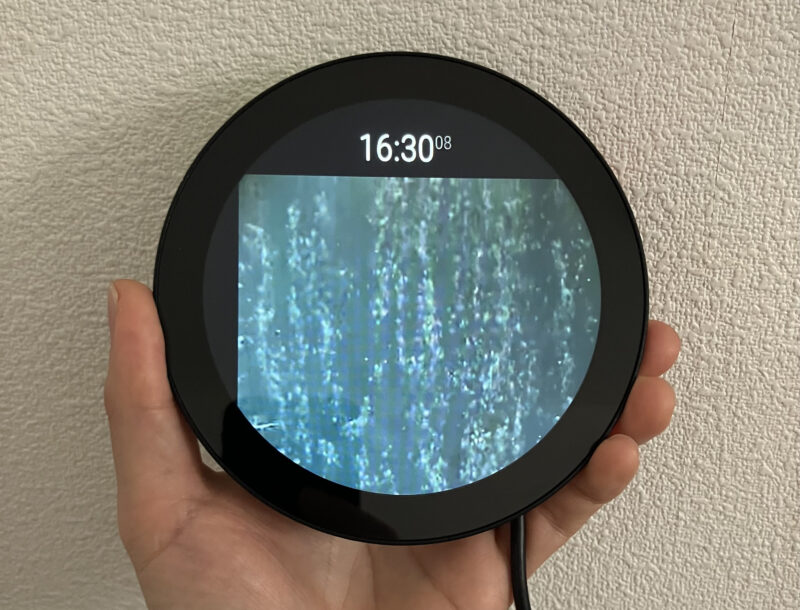
表示サイズは大きくなりましたが、もっと左上に表示を移動させたいところです。
YouTube動画の表示位置の調整
モジュールの表示位置は、config.jsの中でposition:を使って調整可能です。ただし、すでに'top_left'に設定されているため、画面の左上に表示されています。さらに左上に動かしたい場合はcustom.cssで設定します。
まず、以下のコマンドでcustom.css という名前の新しいファイルを作成します。
touch /home/pi/MagicMirror/css/custom.css以下のコマンドを使い、作成したファイルをnanoエディタで開きます。
nano /home/pi/MagicMirror/css/custom.css以下の内容を書き込みます。
.MMM-EmbedYoutube {
  margin-left: -370px;
  margin-top: -150px;
}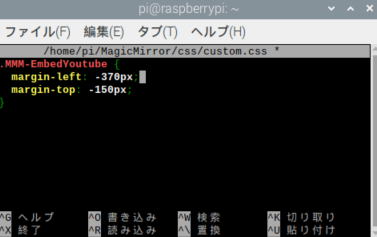
nanoエディタでファイルを保存して終了するには、Ctrl + Oを押して保存し、Enterを押してから、Ctrl + Xで終了します。
margin-left: -370px;:動画の表示エリアを左に370ピクセルずらすように指定しています。マイナスの値を使うことで、通常の位置から左に移動します。margin-top: -150px;:動画の表示エリアを上に150ピクセルずらすように指定しています。マイナスの値を使っているため、通常の位置から上に移動します。
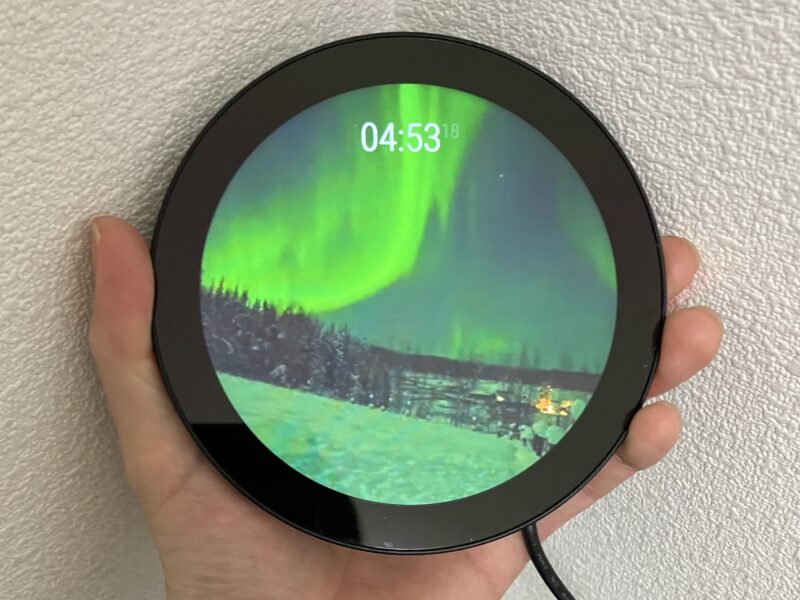
完成
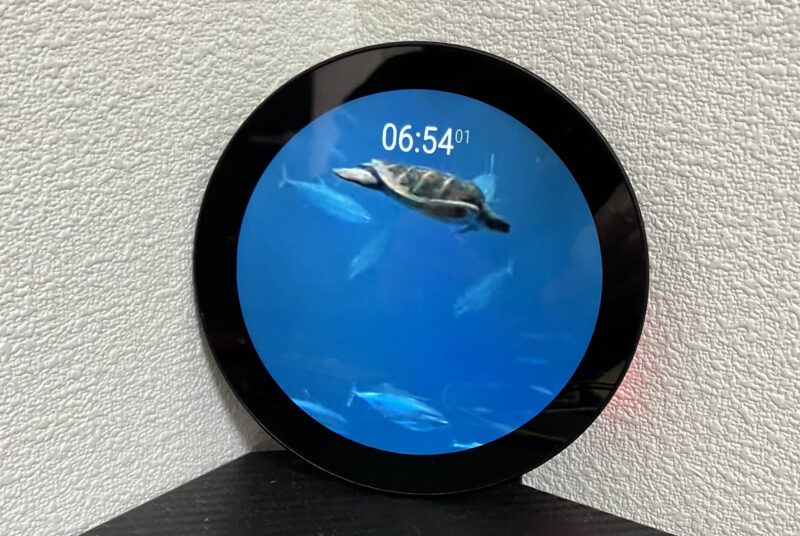
無事に全画面表示ができました。
【応用】一定間隔で動画を切り替える
ここからは応用になります。オーロラのライブカメラを見ていたのですが、オーロラが現れる様子が全くありませんでした。そこで、異なる場所にあるライブカメラを順番に切り替えて表示することで、オーロラを見つけるチャンスを高めようと考えました。ここでは、複数の動画を定期的に切り替える表示方法を紹介します。
まず、MMM-EmbedYoutube.jsを以下のように変更します。
Module.register("MMM-EmbedYoutube", {
    defaults: {
        autoplay: false,
        cc_load_policy: false,
        color: "red",
        controls: false,
        disablekb: false,
        fs: true,
        height: 900,
        width: 1300,
        loop: false,
        modestbranding: false,
        rel: false,
        showinfo: false,
        video_id: "",
        playlist: "",
        video_list: [],
        videoRotationList: "", // 動画IDのリスト
        rotationInterval: 60000, // 1分おきに動画を切り替える
    },

    start: function() {
        this.currentVideoIndex = 0; // 現在の動画インデックス
        this.updateVideo(); // 最初の動画を設定
        this.scheduleUpdate(); // 動画更新スケジュールを設定
    },

    scheduleUpdate: function() {
        var self = this;
        setInterval(function() {
            self.updateVideo();
        }, this.config.rotationInterval);
    },

    updateVideo: function() {
        if (this.config.videoRotationList.length > 0) {
            this.config.video_id = this.config.videoRotationList[this.currentVideoIndex];
            this.currentVideoIndex += 1;
            if (this.currentVideoIndex >= this.config.videoRotationList.length) {
                this.currentVideoIndex = 0; // リストの最初に戻る
            }
            this.updateDom();
        }
    },

    getDom: function() {
        var wrapper = document.createElement("div");

        // Parameter
        var params = "";

        var videoList = "";
        if (this.config.video_list && this.config.video_list.length > 0) {
            videoList = "&playlist=";
            for (var i = 0; i < this.config.video_list.length; i++) {
                videoList += this.config.video_list[i];
                if (i + 1 < this.config.video_list.length) videoList += ",";
            }
        }
        params += (this.config.autoplay) ? "autoplay=1" : "autoplay=0";
        params += (this.config.cc_load_policy) ? "&cc_load_policy=1" : "&cc_load_policy=0";
        params += (typeof this.config.color !== "undefined" && this.config.color != "red") ? "&color=" + this.config.color : "";
        params += (this.config.controls) ? "&controls=1" : "&controls=0";
        params += (this.config.disablekb) ? "&disablekb=1" : "";
        params += (this.config.fs) ? "" : "&fs=0";
        params += (videoList != "" && (typeof this.config.playlist === "undefined" || this.config.playlist == "")) ? videoList : "&playlist=" + this.config.video_id;
        params += (this.config.loop) ? "&loop=1" : "";
        params += (this.config.modestbranding) ? "&modestbranding=1" : "";
        params += (this.config.rel) ? "&rel=1" : "&rel=0";
        params += (this.config.showinfo) ? "&showinfo=1" : "&showinfo=0";

        var videoId = this.config.video_id + "?version=3";
        if (typeof this.config.playlist !== "undefined" && this.config.playlist != "")
            videoId = "playlist?list=" + this.config.playlist + "&";

        wrapper.innerHTML = "<iframe width=\"" + this.config.width + "\" height=\"" + this.config.height + "\" src=\"https://www.youtube.com/embed/" + videoId + "&" + params + "\" frameborder=\"0\" allowfullscreen></iframe>";
        return wrapper;
    }
});
次に、config.jsを以下の内容に書き換えます。
var config = {
    address: "0.0.0.0",
    port: 8080,
    ipWhitelist: ["127.0.0.1", "::ffff:127.0.0.1", "::1"],

    language: "ja",
    timeFormat: 24,
    units: "metric",

    modules: [
    		{
			module: "clock",
			position: "top_center",
            config: {
                showDate: false,
                displaySeconds: true
                },
		},

{
    module: 'MMM-EmbedYoutube', // Path to youtube module from modules folder Exmaple: MagicMirror/modules/custom/MMM-EmbedYoutube/ so it's custom/MMM-EmbedYoutube
    position: 'top_left', // This can be any of the regions.
    config: {
      // See 'Configuration options' in README.md for more information.
      videoRotationList: ['dkLjO4TE634', 'O52zDyxg5QI'],
      rotationInterval: 60000, // 1分おきに動画を切り替える
      loop: true,
      autoplay: true,
    },
  },
    ]
};

/*************** DO NOT EDIT THE LINE BELOW ***************/
if (typeof module !== "undefined") { module.exports = config; }
更新間隔はrotationInterval: 60000の数値で変更できます。単位はミリ秒なので、60000は60秒です。
MagicMirror²は面白い
MagicMirror²には、多くのサードパーティ製モジュールが公開されています。興味があるものを試して、自分だけのオリジナル表示を作成してみるのはいかがでしょうか。
以下は、MagicMirror²を使用して作成した表示の例です。